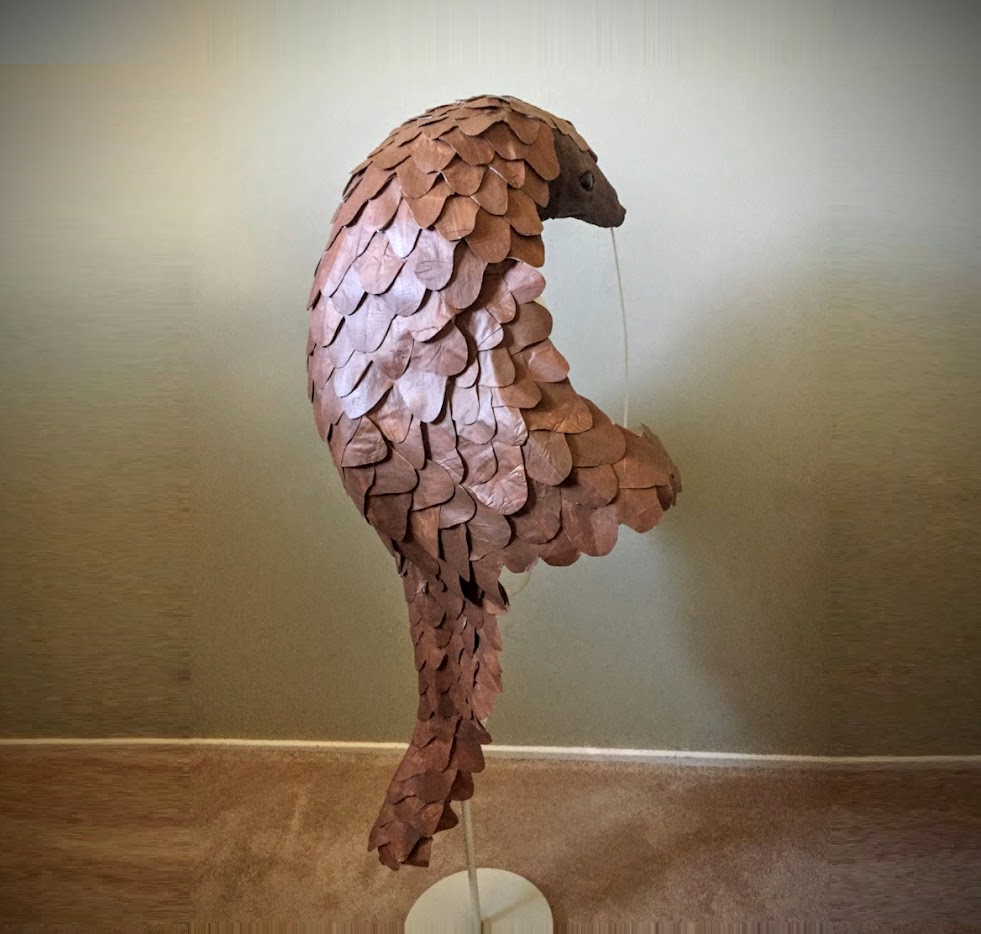
A costume for my 5 year old 🙂
Design
So, most years I try to make costumes for my kids for halloween, and for Halloween 2020, my youngest wanted to be a pangolin. I can’t remember exactly how we ended up on that creature, but thought it would be a fun project.
I gathered a bunch of reference photos of pangolins in a Pinterest board [INSERT LINK] to get a sense of the overall form, color, body parts. They’re fascinating. They’re covered in these cool spade-shaped scales and walk around on their hind legs with their front arms bent up in front of them, like an adorable, armored toddler villain, walking around, silently plotting world domination.
Yes, son, this would be a good choice.
Build
Mannequin

Yeah, it looks a little creepy, but it did the job.
I was primarily working on this at night, often way past the kids’ bedtime, so I wanted to be able to test fit it on my kid without having to wake him up and be there in person. So, I wrapped my kid up, shoulder down to feet in a layer paper, and then masking tape. I then carefully removed the layer and filled it back up with newspaper. I test fit the pieces on this throughout the build.
If you try this technique, don’t keep your children in there very long. After a few minutes of laughing, the novelty wears off… and it gets hot and uncomfortable after a few minutes.
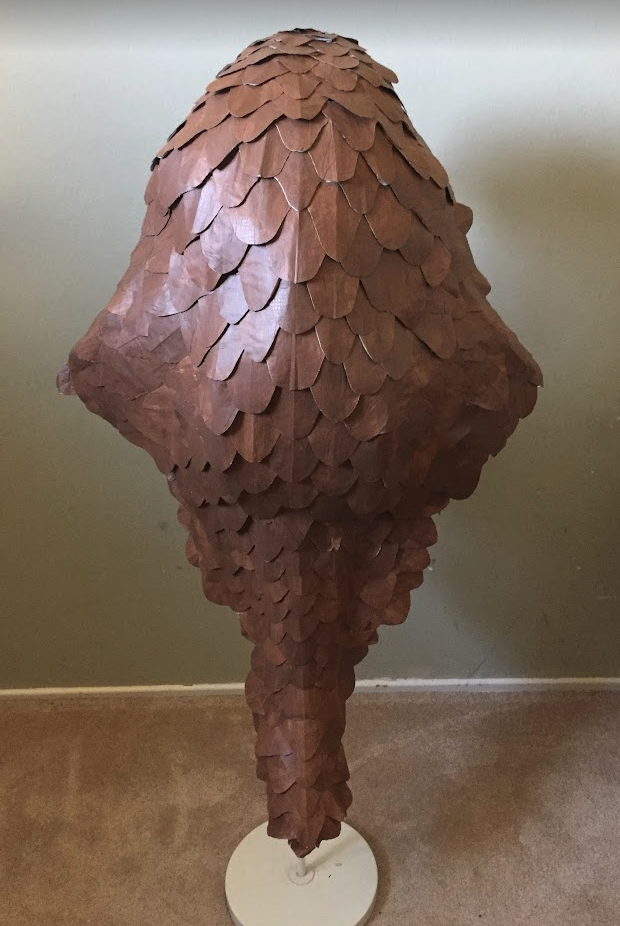
Frame and Underlying Form
I needed a rigid frame of sorts, to get the curve along the back. I made this out of some rigid poster board and good ol’ masking tape.
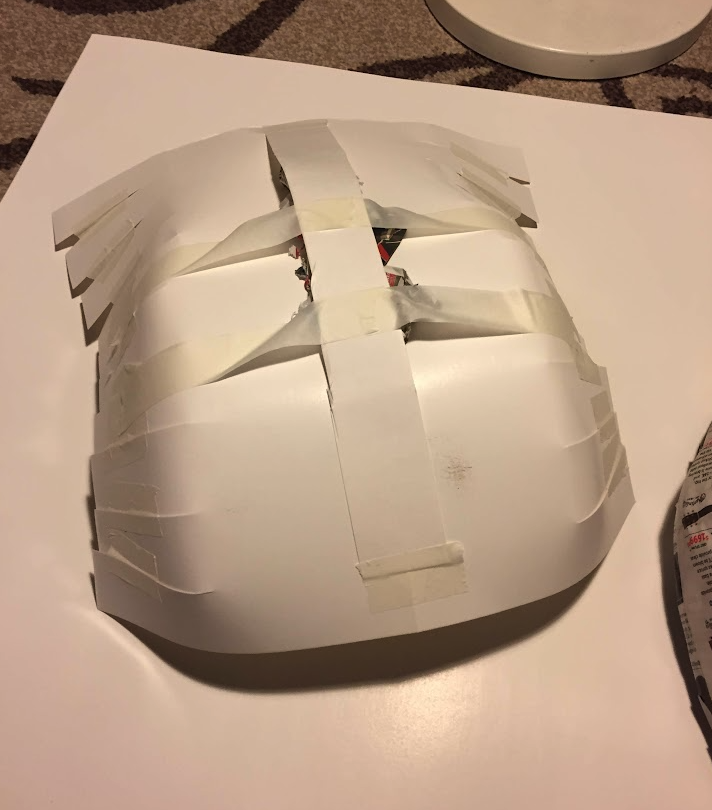
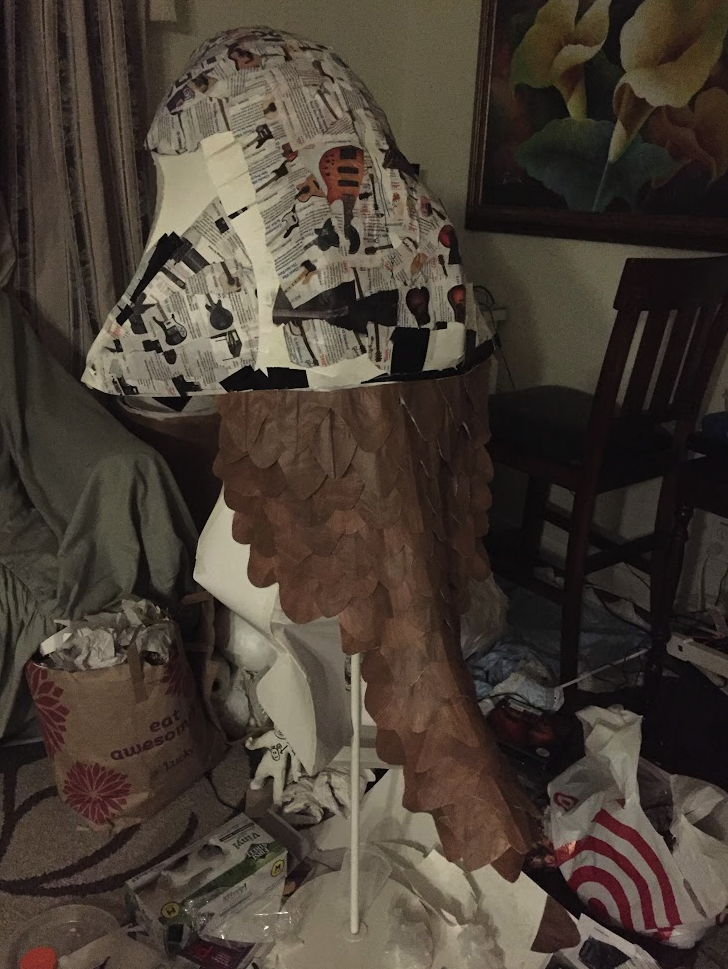
The rest of the underlying form (the layer underneath the scales) was made from more cut poster board and paper mache. You can see more of what the form looks like in the photo, below.
Note: I didn’t end up using the leg part that you see in the photo.
The Scales
Mixing the Paint
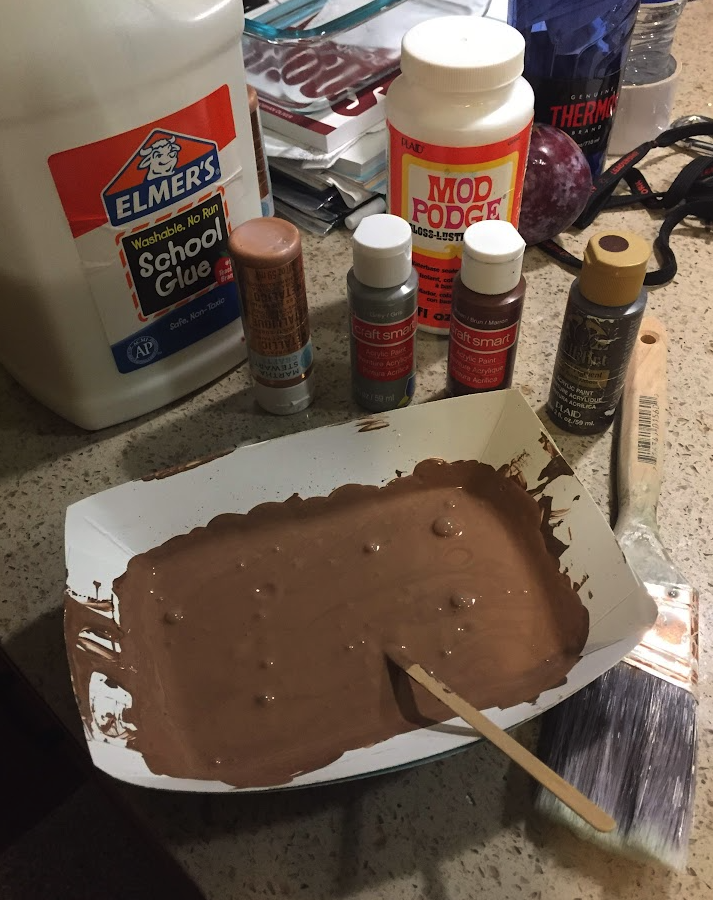
To get the color I was looking for, I mixed a combination of brown, gray and copper acrylic paints (see photo).
Cutting the Scale Shapes
I wanted to use thicker card stock paper for this, since I wanted the scales to be fairly rigid, but didn’t have enough on hand, so I glued two long pieces of butcher paper (about 2 feet wide by 10 feet long) together to make one thick piece.
From there, I painted an entire side of the butcher paper with the brown paint, and after waiting a day or so for it to dry, I drew out the shapes of the scales on top of the paint.
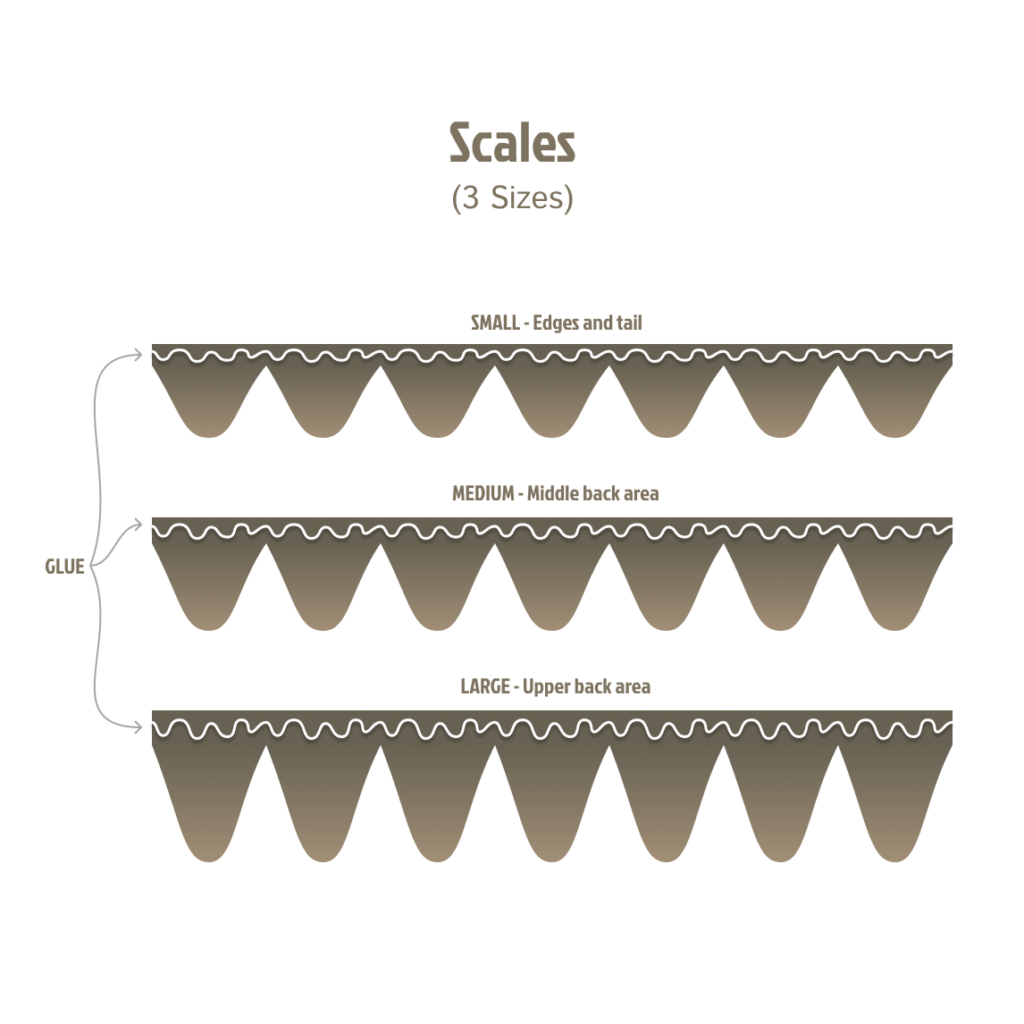
I noticed that the pangolin scales are varied in size, so I created three sizes: small (for the edges and tail), medium (for the middle area of the back), and large (for the top of of the back/head area).
I created rows of plates for each of the sizes with an area along the top for some glue to layer each row on top of each other.
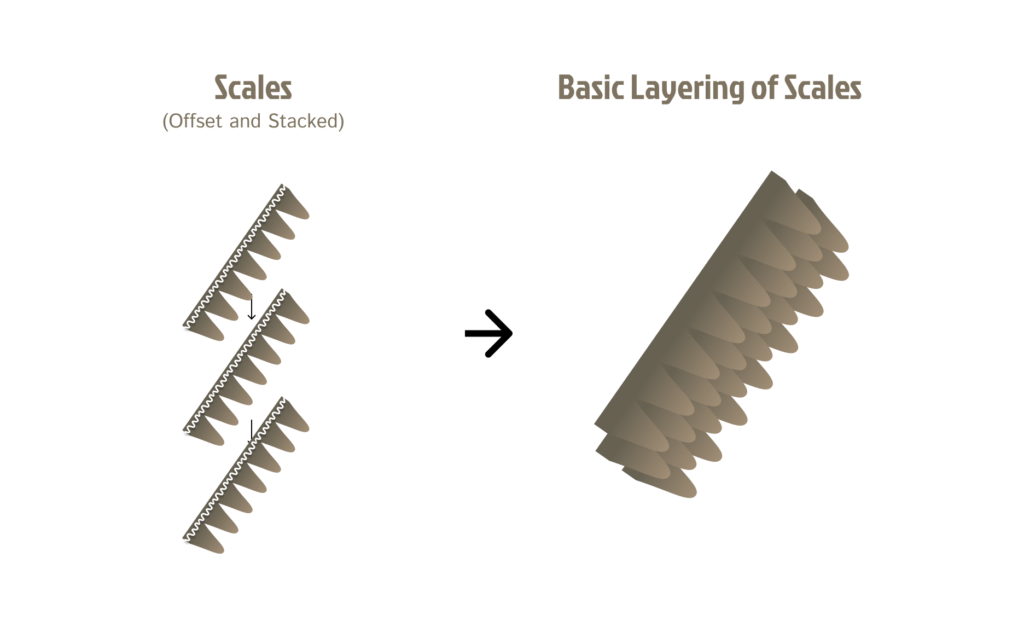
Creating a row of scales speeds up the process of laying them out on the form. The image above shows the basic layering of the scales. This is how the majority of the scales were laid out for the costume. I cut out and placed individual scales for parts of the tail, the edges, and areas of the costume where the scales change orientation.
Putting It On
I don’t have photos for this, unfortunately, but the costume is in two parts: a top and bottom that comes apart at the waist. The top of the costume is put on like a backpack with shoulder straps with loops at the tips of the “hands” to grab onto. The bottom half attaches to the bottom of the top half and moves independently from the top. Sorry again.. no photos of that side. 🙁
Conclusion
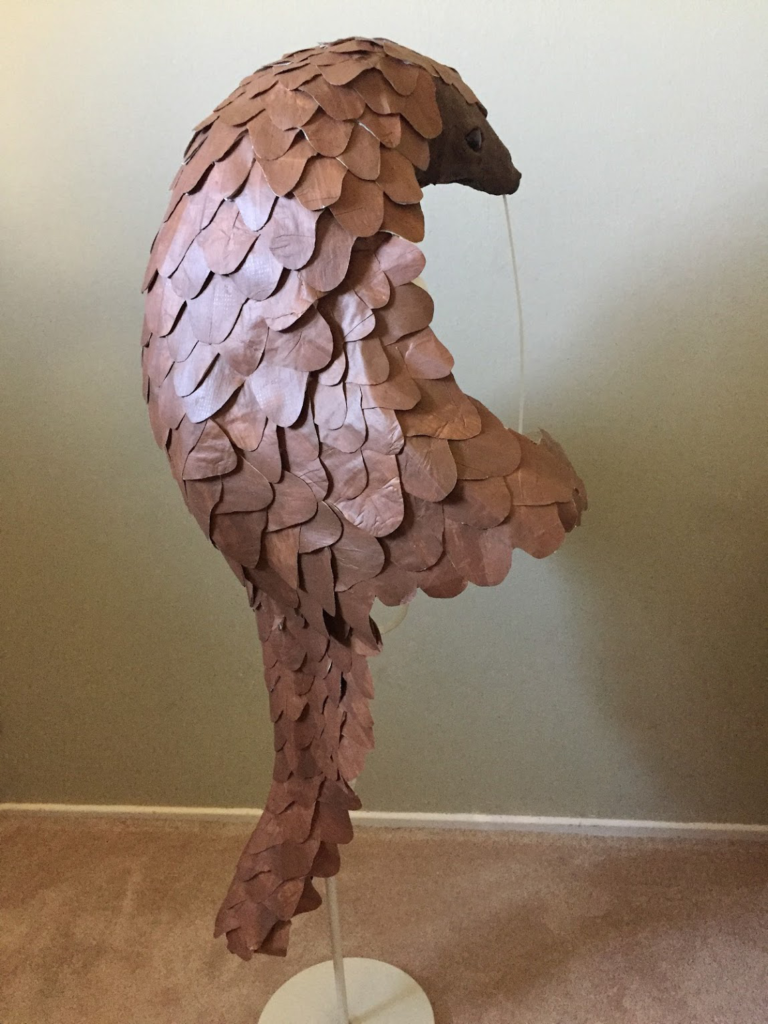
This was one of my favorite and memorable costumes I made for my kids. It got lots of looks and “nice costume!”s and “what is that?”s at my son’s Halloween school carnival, so it was a fun conversation starter about halloween, pangolins, art, and costumes for kids. Good times.
Hope this gives you some ideas for some of your own creative endeavors.
Tools & Materials List
Below are links to tools and materials I used and recommend for the project. If you end up buying any of them through these links, a tiny bit of the purchase will come my way.
Peace
Tools
- X-Acto Blade – The thicker handle actually helps with hand fatigue, especially for the amount of cutting a project like this involves.
- Scissors – Good scissors with thicker handles are def more comfortable.
- Paint Brush – Been using this Purdy brush for years. Probably overkill for this type of project, but I’ve really liked the quality of these brushes.
Materials
- Metallic Gold Paint – The Martha Stewart brand paint I used for this is no longer available, but this should be similar.
- Acrylic Paints – Any kind will do, but I’ve had consistent results with the Liquitex brand.
- Masking Tape – I use this stuff for everything. Cheap bulk stuff for this type of project will do.
- Butcher/Craft Paper – A big ol’ roll will last a long time. I used almost 20 feet for this because I doubled up, but that’s probably not entirely necessary.