I went down to the garage this morning and noticed a wall shelf with hooks that I made about 10 years ago. I thought to myself, “Hey, that thing seems to be holding up pretty well” and I started thinking about other projects I’ve wanted to make lately.
A few steps into the garage, I saw a small scrap plank of wood and a pen from a recent header board replacement and refinishing project I was doing for a friend, so I figured I might as well get some thoughts out of my head and into the real world.
Design
So, with pen and scrap wood in hand, I went upstairs and started sketching.
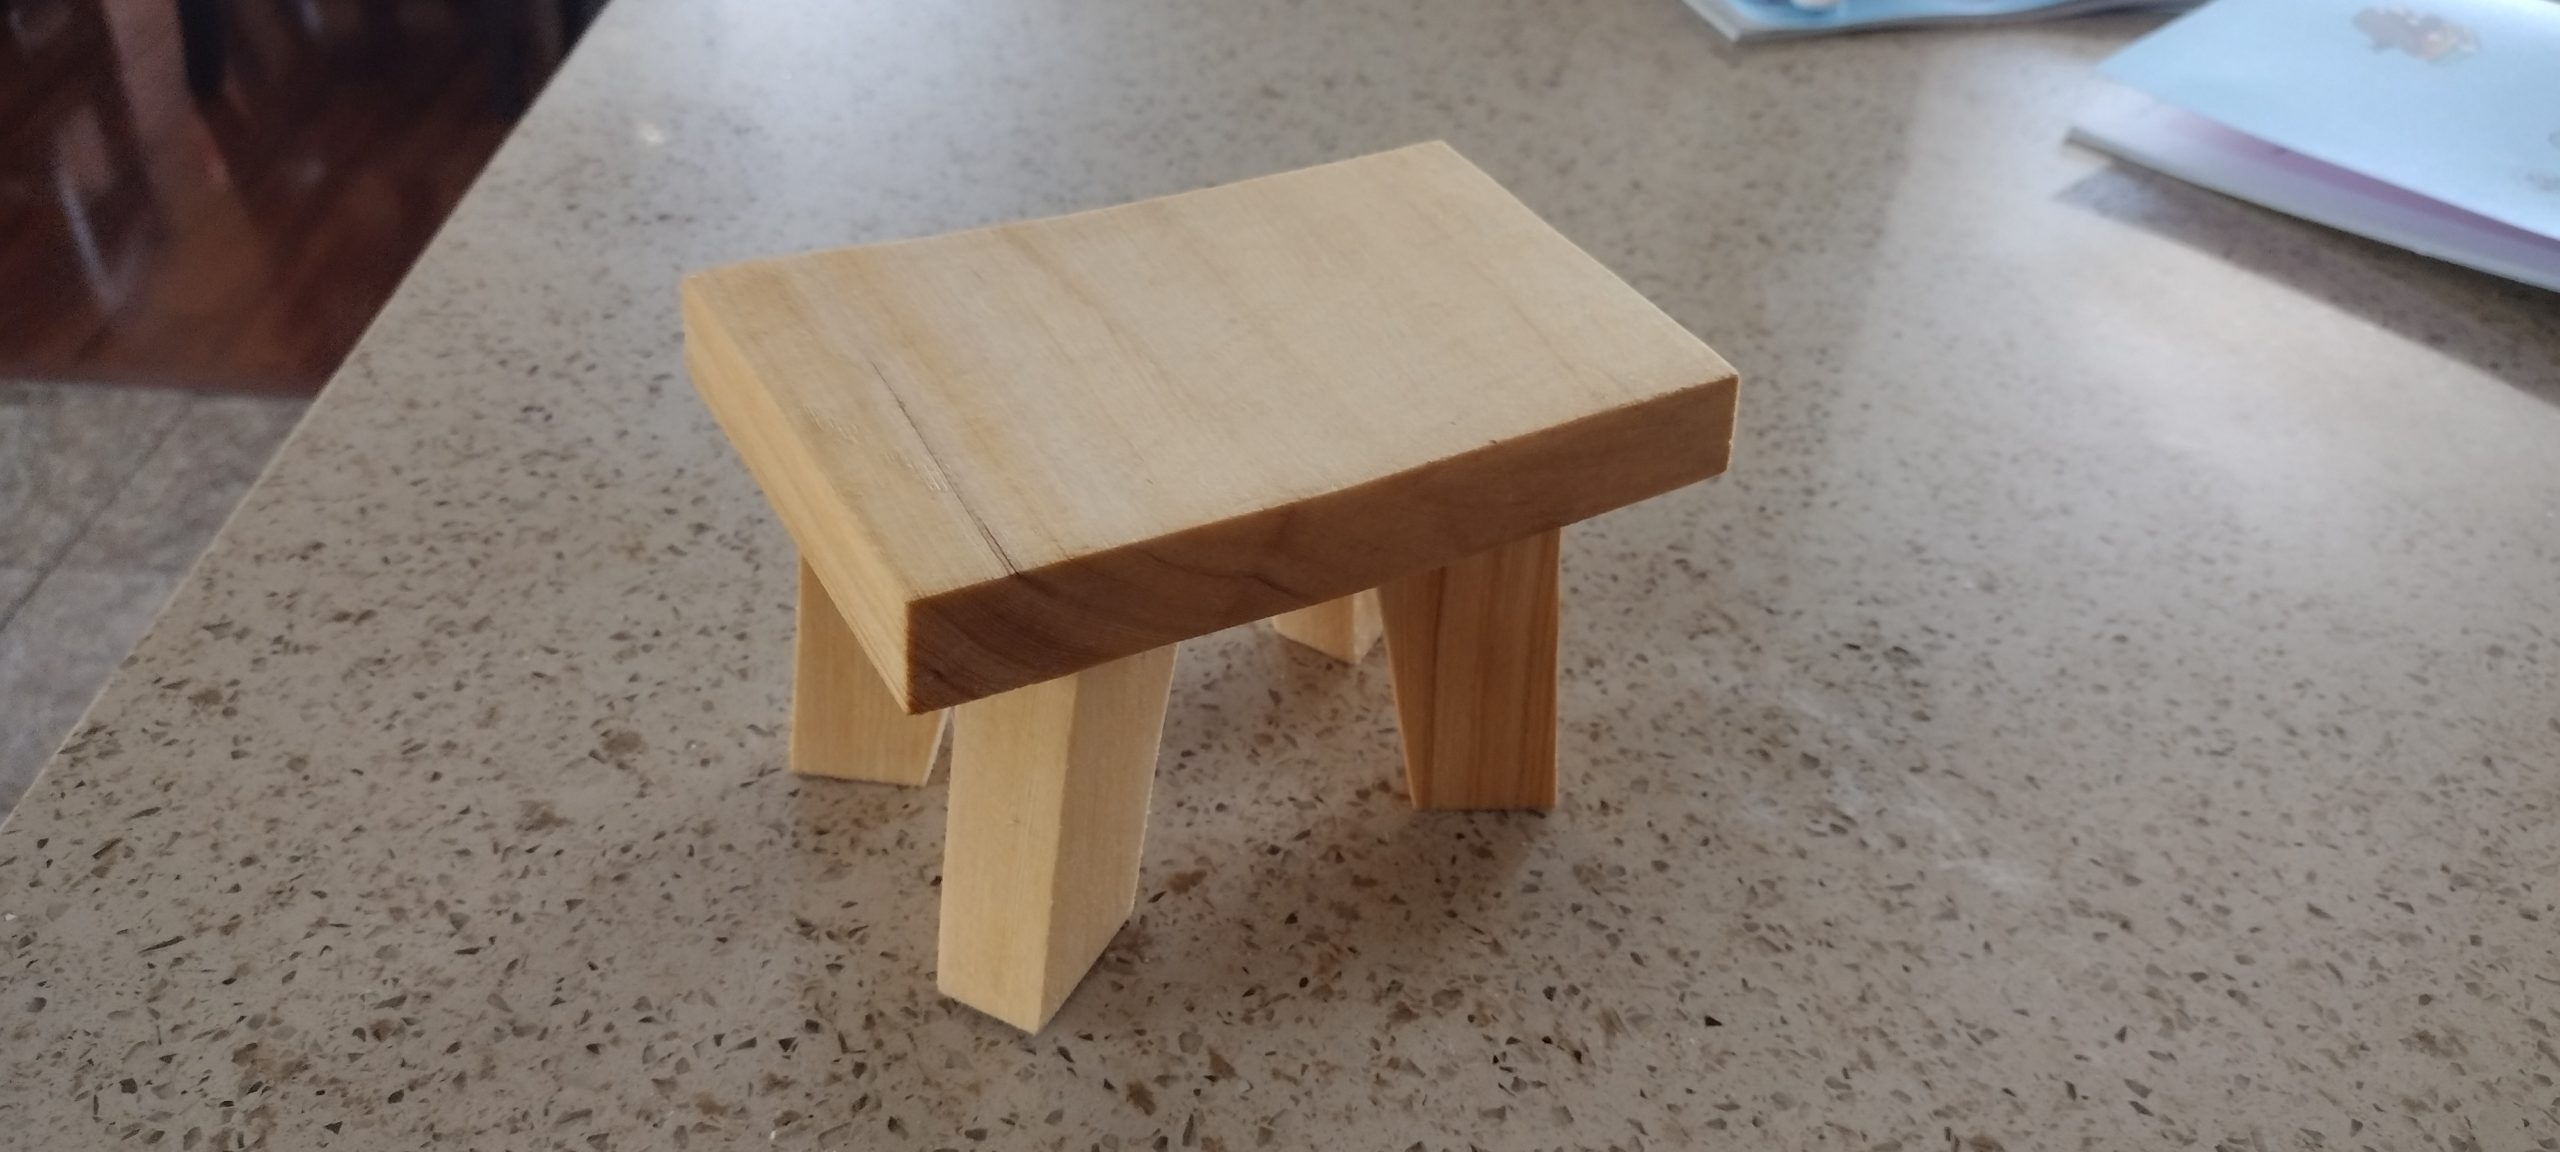
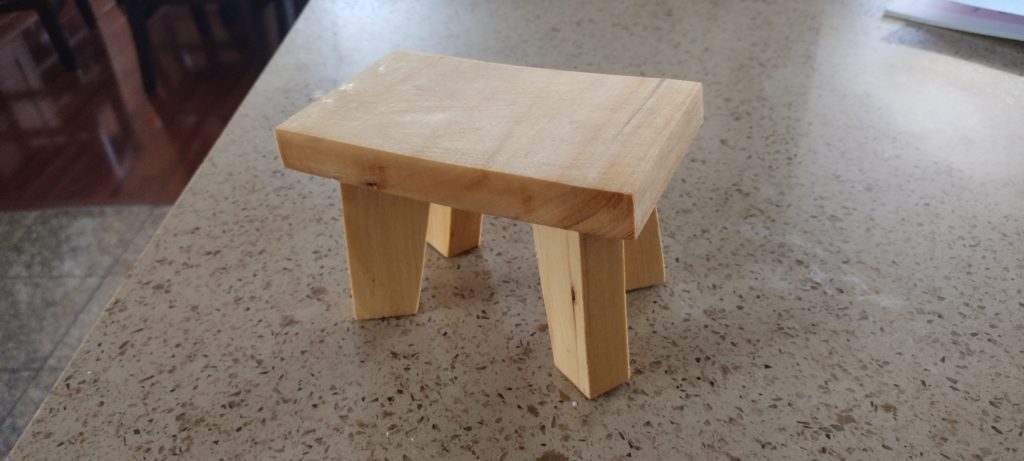
It’s a table (prototype).
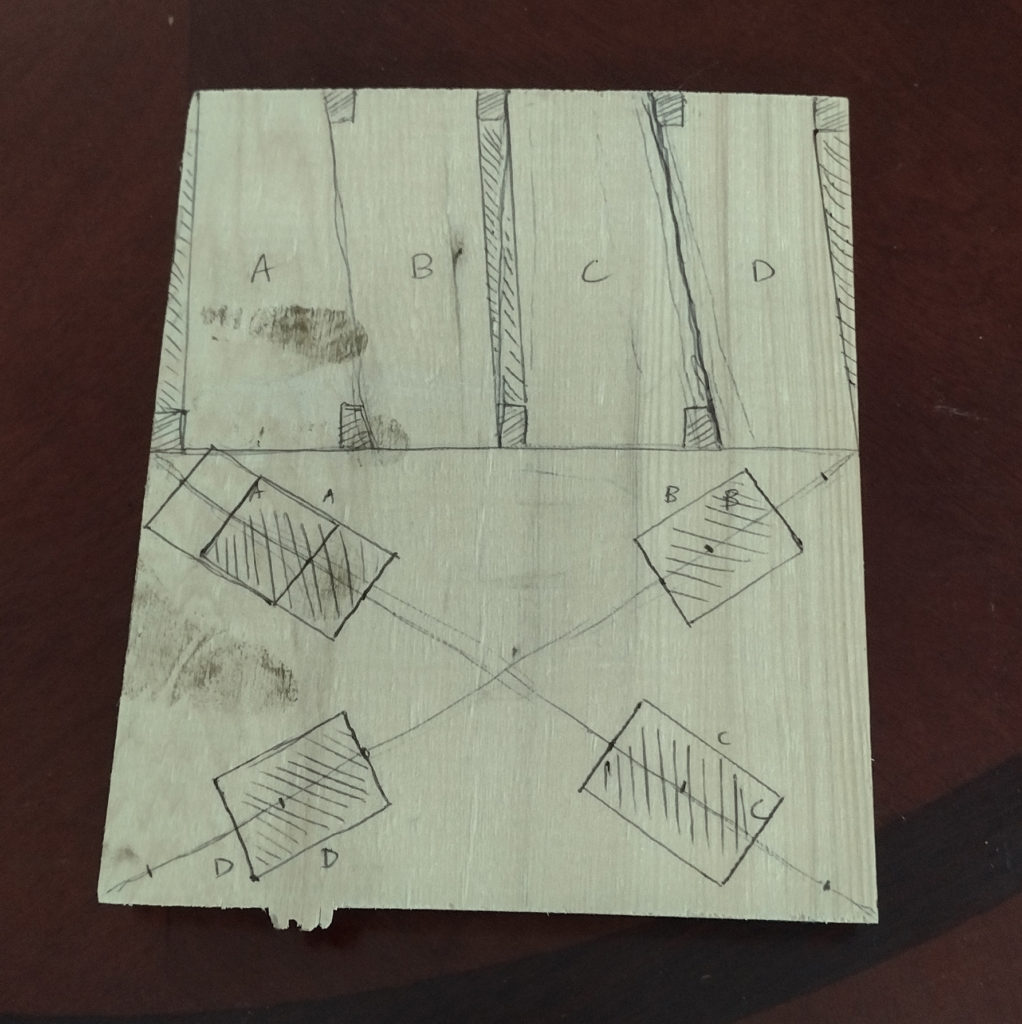
It might be a little hard to tell what’s going on here, but the top half are the legs, and the bottom half is the underside of the table top.
All four of the legs have the same basic shape which you can see most clearly in shapes B and D. The top of each leg is basically a tenon meant to fit into the corresponding mortise on the underside of the table top, indicated on the bottom half of plank.
Build
Cutting the pieces
Cutting out the shapes was pretty straightforward–all done on the band saw. Since this was just a prototype, I cut these fairly quickly, since I was pretty much just trying to test the idea. The “tenons” were also part of the shape of the leg.
Cutting the Mortises
The trickiest part of creating this prototype is creating the “mortises” for the tenons. I’m not sure if the joinery here would officially be considered a mortise and tenon since I think tenons usually have shoulders on four sides, but this prototype only has it on one, but the idea is basically the same. If I decide to create a real table later, I’ll probably build these out as proper tenons.
The first mortise was done with a straight router bit, using the Dremel workstation as a drill press/plunge router. This didn’t give me very tight corners for the mortises, so I refined the process to this:
- Using the Dremel, plunge a hole using a 1/16″ bit on all four corners of each mortise. Set the depth stop to about 1/4″.
- Using a straight router bit, route the inside area inside the four corners, gradually increasing the depth to match the 1/4″ depth of the corner holes.
The process provided enough space for the tenon to fit snugly enough into the mortises and stay in place without adhesives.
Dry Fit
Again, pretty straightforward. Just put the four leg tenons into the four mortises.
I was pretty happy that things came together pretty quickly, and the table prototype didn’t wobble too much.
Sanding and Finishing
With the dry fit a success, I removed the pieces and sanded each part with 60 grit with the palm sander to remove all the marks. At this point, I wasn’t going for anything super finished, so the 60 grit was enough.
After sanding, I put the pieces back together with some Tightbond III.
I decided to finish it with something I never tried before… coconut oil. The only reason being that there was a jar of it in the bathroom (leftover from my daughter’s science experiment on skin care).
The finish was soft and matte, so it wasn’t too bad. Plus, it had a nice little coconut scent (which lasted a few hours).
Conclusion
So, I wanted to see if a small-scale model of a table design like this would work, and I also wanted to practice a little bit of joinery, sanding and finishing with this little prototype. I’d say this was successful in that, at least at this scale, putting a table top on legs in this kind of way can work.
Seemed like a pretty productive/helpful couple hours.
Next Steps
If I decide to do a larger version of this, I’d want to more accurately work on the joinery so the fit is nice and tight all the way around each mortise/tenon. I also don’t know if that kind of joint would be strong enough to hold significant weight, so I may want to beef those areas up somehow and maybe add some braces to keep the legs in place more securely.
In any case, the family appears to think the prototype looks cool, so we’re keeping it.
Tools & Materials List
Below are links to tools and materials I used and recommend for the project. If you end up buying any of them through these links, a tiny bit of the purchase will come my way.
Peace
Tools
- Band saw – Pretty sure my band saw is discontinued now, but my small band saw has a tilting base like this. I hardly use that feature, though TBH.
- Chisels – I might invest in some better ones in the future, but a basic set like this will work just fine for something like this (as long as they’re sharp, of course).
- Dremel
- Rotary Tool – I’ve had one like this for over 15 years and it still works well.
- Dremel Drill Press Rotary Tool Workstation Stand – Game changer to use this to make more accurate cuts, grinds, etc.
- 1/8″ Drill Bit – Because I used the Dremel and stand as a drill press.
- Plunge router bit (#654)- These small bits work fine for small projects and prototypes like this.
- Palm Sander – The sharp end really helps get into tight spaces
Materials
- 1×6 Pine Board – Home Depot, Lowes, anywhere that sells lumber
- Titebond III – Any kind of wood glue would work for a prototype, though.
- Coconut Oil (the “finish”) – OK for getting a preview of what the a prototype might look like when finihed, but definitely use real finish for actual products.